
This page will guide you through upgrading BIND on Windows.
Step 1: Ensure your Windows server is fully patched
This is always good practice anyway, but in the case of BIND upgrades it will ensure that the system is using the latest updates to any BIND dependencies, in particular the Visual C++ Runtime library.
Step 2: Downloading BIND for Windows
Download the latest version of BIND for Windows from here: https://www.isc.org/download/
Scroll down the page and click on BIND 9. Then click the blue Download button next to the most recent Current-Stable version. You’ll get a pop-up window and one of the options will be BIND9.{version-number}.zip – win 64-bit. That’s the one you want. You will almost always want the version that’s marked as Current-Stable. I don’t recommend running the Development version on a production server.
I strongly recommend using a tool like WinMD5 to verify the signature of the file you downloaded. That way you can be sure that you’ve got the genuine article and your download hasn’t been intercepted.
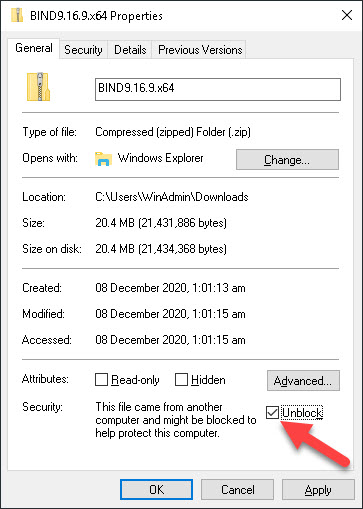
Once you’ve downloaded the zip file you need to unblock it. If you don’t do this then Windows won’t allow the executable to run, and that will cause all sorts of unexpected errors when you try to install and run BIND. Find the downloaded file, right-click on it and choose Properties, then tick the Unblock checkbox as shown below, and finally click on OK.
Once you’ve done this you can then right-click the downloaded zip file to extract it to a temporary folder as normal. Don’t overwrite your current BIND installation folder, that would be a very bad idea!
Step 3: Backup you current installation
Naturally you should be running proper backups of your Windows Server, but it’s good practice to nevertheless take a backup of BIND before upgrading. That way we can rollback to the previous version without having to do a full blown server restore. One of the benefits of BIND using configuration files is that backing-up your current BIND installation is very easy:
- Stop the ISC BIND service (not strictly necessary, but ensures anything in memory is flushed to disk)
- Copy/paste the entire BIND folder elsewhere (eg C:\BIND.backup)
- Restart the ISC BIND service
Step 4: Run the upgrade
Now we’re ready to run the upgrade. Double-click BINDInstall.exe from the extracted zip-file. The installer will detect your existing BIND installation folder along with the current Service Account Name:
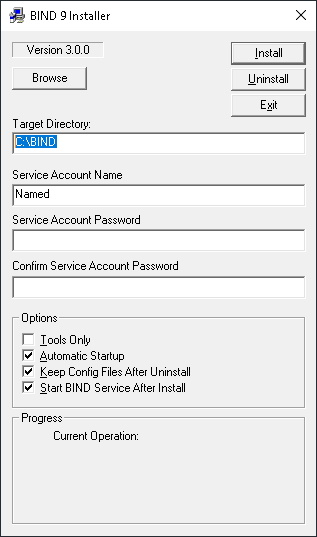
There’s no need to re-enter the Service Account Password, you can leave that empty.
Make sure that Start BIND Service After Install is ticked, otherwise the ISC BIND service won’t be restarted after the upgrade.
Click on Install
At this point you might get a Microsoft Visual C++ 2017 Redistributable pop-up message. That’s because the BIND installer has triggered the Visual C++ Installer first:
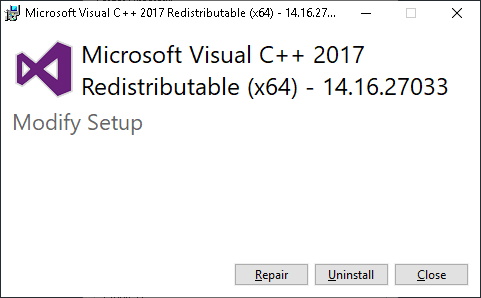
Simply click the Close button followed by Yes.
Shortly afterwards you should see a success message:
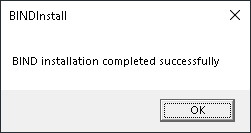
Click OK then head to Services and make sure the ISC BIND service is Running. It’s also a very good idea to check the Application Event log at this point. BIND will sometimes start successfully even if there are minor errors in your configuration or zone files. It’s therefore important to make sure that there are no Warning or Error messages logged by the Named source.
If all is well then you’re done – BIND has been successfully upgraded. You can drop to a command prompt and confirm that you’re running the new version by typing named -v
C:\BIND>named -v
BIND 9.16.21 (Extended Support Version) <id:a8aa450>
Step 5: If necessary – restore from backup
If something went wrong during the upgrade, if the ISC BIND service doesn’t start successfully, or if you see unresolvable Warning or Error messages in the Application Event log then it’s easy to restore to the backup you made in Step 3:
- Stop the ISC BIND service if it’s running
- Delete the contents of C:\BIND
- Copy/paste the contents of your backup folder into C:\BIND
- Make sure the file system security permissions are set correctly (see Step 5 in the Installation Guide)
- Restart the ISC BIND service.
At this point it’s worth contacting ISC to see if they can help identify what went wrong before trying again. You can also join the bind-users mailing list, or even contact me and I’ll be happy to try and help.